Five Tips for DIY Tile Projects You May Want To Do
 22 January 2019

DIY Tile Projects, large & small
Maybe you've done successful DIY projects before, and you've always yearned to try laying tile. Probably you have several places in your home where you'd love to pull up the worn-out carpeting and lay tile instead.
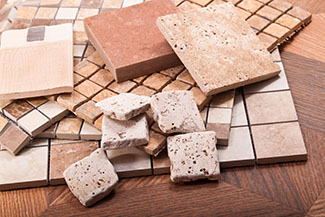
Perhaps your bathroom tile is cracked and out-of-date. Maybe you'd like to put tile on top of your concrete patio or is that even possible? Tile backsplashes, tile trim in the swimming pool –all that seems appealing. These days hundreds of types of tiles are for sale: ceramic, porcelain, Saltillo, stone and more. You can handle all that, right?
We asked Joe Fortuna, owner of Mexican Tile and Stone in Phoenix and Tucson, for his suggestions on starter projects and for tips on making jobs go smoothly. He urged first of all a word of caution for do-it-yourselfers: remember that the method of installation depends on the kinds of tiles to be laid and the conditions of the floor or walls they are adding tile to.
With all projects below, be sure to get the specs from the tile company before starting work:
1 | Laying a tile floor
Start small, not big. "If you want to try doing a floor, a small bathroom, powder room or closet; maybe about 40 square feet would be a good size, or even the area under a roll-out refrigerator," Fortuna said.
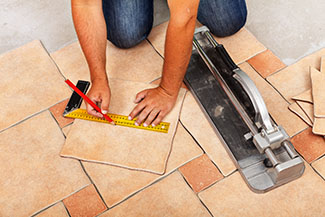
He also recommended studying similar projects online and always measuring twice and cutting once. What follows is a general outline for how to lay tile on floors. But every situation will be slightly different.
- To lay tile on a concrete slab, the area must be clean and flat. Before installation, any old tile on the floor must be removed as well as leftover adhesive on concrete. Cover any floor cracks with the appropriate crack isolation membrane; fill in any divots.
- Next the thin-set (an adhesive) is put down and tiles are laid. During this process, movement joints (small, un-grouted gaps) should be installed all around the perimeter of the tile floor and every 20 to 25 feet of flooring on the interior and 8 to 10 feet on the exterior. These joints will prevent the tiles from popping up or "tenting" later when the temperature of the concrete changes as the seasons change. Ask your supply house for color-matching caulking for movement joints.
- Then the thin-set must dry thoroughly. During the several hours or more of drying time, no one should walk on the surface. It goes more quickly in hot, dry weather and longer during colder weather.
- With some types of tile – like natural stone, some porcelain and marble – pre-sealing may be needed. If not done, "picture-framing" can take place when the grout is applied. "Picture framing" means moisture from the grout or thin-set seeps into the tile to make an ugly border on each tile.
- Finally, grout is applied, and the surface of the tile is wiped clean. This may require several wipe downs to remove all of the grout residue from the surface of the tile.
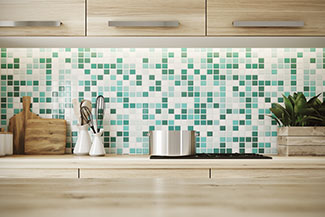
2 | Adding a tile backsplash in your kitchen
It's easy to install tile on a cleaned-up, painted wall surface behind counters, sink and range in your kitchen. First, remove any wallpaper. Then sand the surface and clean up dust. Easiest to work with are mesh-backed sheets of mosaic glass or ceramic tiles. Measure your space to estimate how many sheets to buy.
When you get the tiles home, measure again. Then use masking tape to outline the size and shape of the wall you are covering on a large piece of cardboard, laid on the kitchen floor. Lay down the mesh sheets of tiles to see how they will fit the space outlined on the cardboard.
In some cases, you must fill odd gaps with partial sheets or extra tiles. Arrange the extra tiles so they end up in an area where they are less visible. Use a tile saw or carbide nipper if you must cut tiles to make them fit. Use spacers between sheets to keep the joints of equal size.
The trickiest part of this job is smoothly applying a layer of thin-set on the wall; then setting the tiles on top of it. If any tiles are slightly concave, you might have to apply more thin-set to the back of the tile. You'll need a wide array of tools including a level, tape measure, notched putty knife, grout application trowel, and sponges. Five-gallon buckets will come in handy, too.
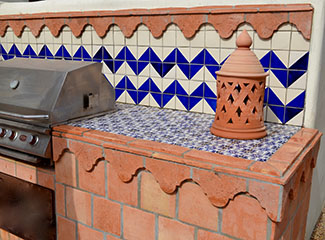
3 |Adding tile trim to stucco walls outside on a patio
A fire pit, fireplace, a bench, or a wall in an outdoor kitchen are all great areas for a DIY tile project. Talavera Mexican style tiles or Saltillo tiles can add colorful accents outdoors. These tiles can be laid on stucco provided that the stucco is in very good shape. Inspect the stucco and apply membrane to any cracks in the wall. You can get the membrane from your supply house. The tiles should also have proper sealing by the manufacturer and have weather-proofing and UV protection. The application process for tile on stucco works very similar to how you would add backsplash in a normal kitchen wall.
4 | Installing tile in a bathroom
If you are installing tile flooring in your bathroom, you would follow the same process for laying a tile floor as described above. Although Fortuna agreed homeowners can lay tile in a small bathroom as a starter project, he discouraged them from tiling showers. "It's too hard for a beginner to work on a shower because of difficulties with drains and water-proofing," he said. "And you never want to have do-it-yourself shower project in a bathroom on the second story."
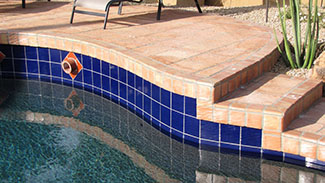
5 | Put tile edging on your swimming pool water line
Setting new tiles along the water line in a swimming pool will work best in a pool with a pebble-tech finish, Fortuna said. It can be more difficult in plaster pools and you won't want to try this in fiberglass pools. Before the job, you have to lower the water surface, and you may have to chisel off old tiles first and the grout joint between old tiles. For best results, contact a certified professional.
Tools you may need for your tile job:
- Pencil
- Tape measure
- Level
- Speed square
- Grout application trowel
- Rubber float to help spread grout
- Grout sponge
- Tile spacers
- Notched putty knife
- Power drill
- Mixing paddle
- 5-gallon buckets
- Kneepads
- Safety glasses and earplugs
- Scoring cutter or wet saw
- Handsaw or jamb power saw
- A handheld grout saw
###
Photo Credits:
RELATED CONTENT:
- Rosie eStore: Custom Rosie on the House Tools Every Homeowner Should Have
- Blog: 7 Steps To A Perfectly Done Tile Floor
- Blog: How Much Time Will That DIY Project Take?
- Blog: Does Your Pool Need A Facelift?
- DIY FAQ: Drywall Damage Patch & Repairs
- DIY FAQ: Four DIY Projects That Help Pay For Themselves
- Podcast: Make This Weekend a DIY Weekend at Your House
Print this page
recent post
- Duck, Duck, Duct! How Often Should Ductwork Be Cleaned?
- Vinyl vs. Fiberglass Windows: Which Is The Better Choice Of Replacement Window?
- We May Be The Grand Canyon State, But The Rocky Mountains Are Important For Arizona
- Welcome to Arizona! Things A Newbie to Arizona Should Know
- The Pros & Cons of Buying A Flipped House
- Getting In On The Ground Floor
- Why It’s More Critical Than Ever To Get Your AC Serviced Before Summer
- The Reality of Remodeling
- What To Look For When Comparing Your Roofing Quotes
- What To Expect When Buying New Windows & Doors