Drywall Damage Patch & Repairs 


Repair and Patch Damaged Drywall
No matter the age of your home, drywall damage will occur. Whether it be from doorknobs, roughhousing, minor water damage, moving furniture or mounting hardware from artwork, mirrors, TV mounts, window treatments, etc. it will happen. Minor damage is a relatively easy fix. Small screw or nail holes can even be patched with white toothpaste and touch painted to blend in.
Repairs to areas of major water damage are best left to the pros. You never know what kind of damage is lurking behind that drywall. There could be mold and that is something that is best left to a professional mold remediation expert.
The age and condition of the paint on your wall and stored paint from when it was applied, are really the key factors in how quickly you will finish drywall repair projects. But it's the quality of the patch work that is critical to restoring drywall walls to look like new. The paint will only look as good as the surface it's applied to. A poor patch with a poor texture match will stand out more than you'd expect, even the best paint coating.
Nail holes in a wall where a picture used to hang van can be filled with spackling paste, caulk or even toothpaste for an especially tiny hole; let it dry and sand it down before repainting.
For dents or holes larger than a quarter, drywall texture and drywall tape or mesh will be required to complete the project. Anything over a 2-inch square will require a scrap drywall piece to cut a filler piece along with the following tools:
#DrywallDamage Project Tool List:
- Utility knife or drywall saw. Having both can come in handy, but you won't need both if you only own or have access to one.
- 12-inch straight edge
- A level
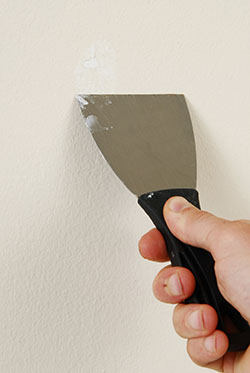
- Four-inch putty knife
- Coarse sponge or sandpaper
Optional:
- Acrylic caulk if the patch is matched up to another material/surface such as a countertop, shower, tile finish, etc.
- Drywall pan if a large amount of mud will be required.
- Texture spray for orange peel finishes.
#WaterDamagedDrywall
Water damaged drywall can be identified in a few different ways. Often times on ceilings and walls you will notice that there are ripples or blisters in the paint. If you feel the blisters and they aren't solid or if the paint starts flaking off as soon as you touch it, you likely have a water issue.
You may even find water in the paint blisters which makes your investigation easy! Other common signs are areas where the drywall is soft to the touch and water stains/discoloration appear. Before you start a water damaged drywall repair be sure to identify and fix the source of the water intrusion.
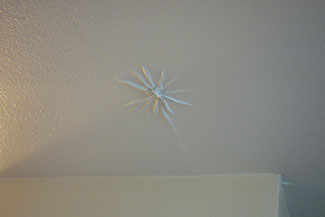
If water is getting into your wall from rain, a sprinkler that's too close to your house, or even from a plumbing leak you're likely to see patches of damage on your walls near the spot of the intrusion. That's because drywall has a paper backing, so when it gets wet, it can bubble and wrinkle, sort of like a sheet of paper does.
To diagnose the problem, place a four-foot level across the damaged area and learn how much the sheetrock has sagged. If it's more than about 3/8 of an inch, the structural integrity of the drywall is probably ruined and the section should be replaced.
If no sagging has occurred, use an awl to randomly push into the sheetrock. You should feel substantial resistance, and the awl shouldn't be able to penetrate the sheetrock any more than 1/8 of an inch without excessive force. However, if the awl goes through the sheetrock much deeper than 3/16 of an inch, consider replacing the section.
To Replace The Section:
Use a utility knife to cut out the damaged area, leaving a square or rectangle so it's easy to match up with a new patch of drywall. Look in the hole to see if the damage goes deeper than the drywall (to the studs, for example) and find the source of the leak so you can stop it before you fix the wall. Set up a fan near the hole you created and thoroughly dry the area before continuing. Cut a new piece of drywall to fit tightly into the hole you have created. You may have to back it with a piece of plywood. Then attach the drywall and use a good-quality drywall tape to cover the seams.
Prime, paint and keep a close eye on it in case the damage returns. That could signal a more serious water problem than you suspected.
To Repair The Damage:
If the damage is superficial, you may not have to replace the drywall. Dry the area thoroughly, sand the blisters from the wall and prime the spot with a pigmented lacquer product called KILZ. This product will keep the stain from bleeding through a new coat of paint.
For tips and tricks on how to repair your drywall check out the podcast link below.
###
YouTube | Good Morning Arizona
Rosie appears on Good Morning Arizona to talk about patching drywall.
PODCAST | RADIO ARCHIVE PAGE
Industry Expert Guest: Rick Thompson of Thompsons Drywall Services
Key Interview Points:
[00:01:36] "whenever we use (drywall) tape whether it's on a crack or anything it has to have the hot mud "
[00:03:29] "You want to square the hole out first so you can measure your new patch"
[00:05:48] "you need to look at the direction of the (existing) texture...(if you are) knocking it down in the other direction that's going to stand out."
[00:09:28] "take your all purpose mud and mix it down and make it (like the texture of) a milkshake "
HOME MAINTENANCE TO DO & Resources
- DIY Q&A: 15 Quick Fix Repairs to Do This Weekend
- DIY Q&A: How Do I Properly Store Paint and Other DIY Materials?
- DIY Q&A: How Do I Know If A Crack In My Wall Is Serious?
- To Do: January Home Maintenance Calendar To-Do: #DrywallDamage
- To Do: August Home Maintenance Calendar To-Do: #WaterDamagedDrywall


