How To Properly & Safely Hammer Nails
How To Properly & Safely Hammer Nails
Remember the scene in Titanic where Rose takes two poorly placed practice swings with an ax to break the handcuffs off Jack . . . and then she actually does it? Well, that’s Hollywood magic. While we aren’t talking about taking ax swings here, we will discuss the proper and safe way to hammer a nail. But first, you need to know how to select the right nail and hammer for the job.
Select the Right Nail
 Nail length is designated by the letter "d" and is referred to as ‘penny.” A 2d (or two penny) nail is one inch long. Every additional penny represents one inch of length. For example, a 6d nail, is 4 pennies larger than a 2d nail and measures two inches. Any size over 20d (four inches) are no longer nails; they're spikes and ordered by the inch, not the penny.
For rough carpentry work such as attaching wood studs to floor plates or constructing header or corner posts, use a three-inch or "16 penny common" nail.

The term "common nail” refers to the diameter of the nail shaft. It is the heftiest of the nail family. In order of decreasing size of the cross-section of the nail shaft, you'll find the box, casing, finish, and brad nails.
Nails can be made from iron, steel, bronze, aluminum, or stainless steel and can be optionally coated with zinc, cement, resin, or vinyl. Nail shafts can be smooth, serrated, or spiraled.
 For nailing two-by-fours together, use 16 penny vinyl-coated common sinkers. For toenailing, which is driving a nail at an angle, use 8 penny vinyl-coated box nails.
There are so many types of nails. For example, for home use, you are likely to use these:
Common nails are standard, heavy-duty nails used for wood framing and other structural work such as walls, floors, ceilings, and roofs.

Box nails are thinner and weaker than the common nail. They're designed for basic wood construction.
Finish nails are thin with small, rounded heads. They are the standard choice for all types of used for baseboards, window and door casing, and crown molding.
Casing nails are like finishing nails, but have a slightly thicker shaft and a cone-shaped head. It is used for heavy wood where greater holding power is needed.

Brad nails are like small finish nails. Because they are thinner and weaker, they work well for fastening thin strips of trim or for tacking together glued wood parts. They are commonly used by craft or DIY-size nail guns.
Masonry nails are used for securing objects like decor to brick or block walls.
With so many types of nails available, consult with your home improvement store salesperson when selecting nails for a particular project.
Select The Right Hammer
 The right nail is useless if you are pounding with the wrong hammer. There are more than 20 types of hammers. You can find one for about every job you can think of. Hang pictures, hang drywall, install roof shingles, drive stakes, form metal, or shatter stone and concrete. There's a hammer for each of those tasks.
These are the Standard types of hammers:
- Tack hammers - for hanging pictures and working on miscellaneous crafts.
- Rubber mallet and hammer - great for “tender” work and sealing lids on one-gallon paint cans.
- Sledge hammer - great for deconstructing.
- Claw hammer- the standard hammer like grandpa had. Available in 12 or 16oz. sizes.
- Framing hammer – similar to a claw hammer but with less claw and generally a bit heavier at 24- 32oz.
Plus, there are different handles such as hickory and fiberglass, and spring steel reinforced rubber and heads ranging in weight from lightweight 300g to 20-pounds in materials like hardened steel to copper and bronze.
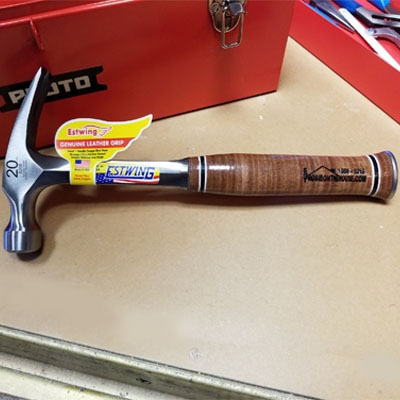
It's good practice to have a collection of hammers in your shop rather than improvising with just one or two. A good one to add to your toolbox is the Estwing Hammer. This solid rip-hammer with a head and handle forged in one piece out of solid American steel has a smooth face and genuine leather grip. And it will last!
Putting the Hammer to the Nail
Before the first strike, put your safety glasses on!
When nailing, never take your eyes off the head of the nail, and don't be afraid to use full swings. Little "grandma pecks" with the hammer that takes 10 or 12 strikes to sink the nail greatly increases your chances of bending the nail and will quickly wear out your wrist. Let the face of the hammer do most of the work for you.
Comfortably grip the end of the hammer's handle. Do not choke up on it as if it were a baseball bat you are going to bunt. If you are right-handed, your left heel rests on the stable surface to be nailed. Start with a firm tap of the hammer. Move your left hand away, and with full swings (from your shoulder, not wrist), sink the nail in two or three blows. The key to not missing is to never take your eyes off the nail!
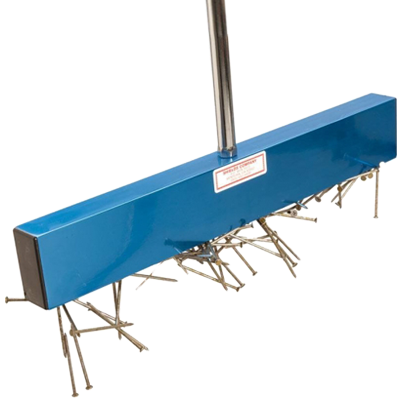
 Caution: the second swing is the most dangerous. This is the one that smashes thumbs, bends nails, and if you glance off the head of the nail it will propel across the room like a bullet! So, pay attention to where and when you are looking. For those nails that fall out of your toolbelt or the wall, pick them up with the Magnetic Nail Sweep. This handy, lightweight tool features an aluminum shell that houses powerful magnetic blocks. Easily snaps up several dozen nails or other metallic debris each time you sweep.
If you have very long fingernails or less than ideal hand-eye coordination, you may want to try this ingenious hack from The Spruce.
Sponge Hack
A sponge acts as a buffer between the hammer and your fingers. Use a dry sponge that is soft on both sides.
Poke the nail through the sponge and hold it in place against the spot on the wall where you'd like the nail to go. Start hammering until the nail is as deep into the wall as intended, then quickly rip the sponge off.
IMPORTANT: There is reason safety warnings are on everything from toys to paper coffee cups. Someone somewhere didn’t use them properly and was hurt. Please do not disregard safety warnings. If you are not confident in your hammering skills even with these hacks, put the hammer down and call a professional handyman or handywoman.
Home Maintenance To-Do | #Hammer&Nail101
###
Podcast
Tune-In! We discuss the Weekly To Do on Hammers and Nails and upcoming events. Plus we answer homeowner questions about does soft water cause no suds in the washing machine, insulating an aluminum frame, funny smell from the bathroom only at night, sealing ductwork yourself and spraying PAM on the air conditioning filter.
Photo Credit
- The Home Depot
- Shutterstock
Related Content
- Rosie Estore Product: Estwing Hammer
- Rosie Estore Product: Magnetic Nail Sweep
- Rosie Estore Product: Go Hang It! Pro
- Blog: Looking For A Perfect Hammer?
- DIY FAQ: What Is The Correct Way To Nail The Wall Together?
- DIY FAQ: How Do I Select The Right Nails For The Job?
