Set Your Fasteners and Hang On!
 27 October 2020
Set Your Fasteners and Hang On!
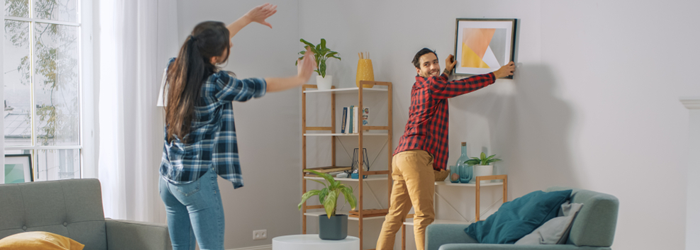
When hanging art or other items on drywall, it is important to know the appropriate device and weight load needed to securely and safely fasten it.
What A Stud!
Wall studs are generally a 2x4 beneath the drywall and are part of the wall's frame. Most structures have vertical studs spaced 16 inches apart, though some run horizontally.
Locate studs using electrical outlets and light switches as a guide. Standard outlets and switches attach to studs. Remove the outlet or cover switch to confirm there's a vertical, wooden beam behind it. Once the stud is located, measure outward, marking off every 16 or 24 inches based on the spacing between studs.
Sometimes a stud can be located by knocking on the wall. A dense, muffled knock indicates there's a stud. A hollow sound indicates there not a stud in that spot.
You can also use a stud finder. A basic, residential finder cost between $10 and $50.
Once you find the stud, the next step is to identify the appropriate nail, hook, or screw in which to attach the piece.
Caution: Before hammering or drilling into the wall, be sure that electric and plumbing lines are not behind the drywall.
No Stud
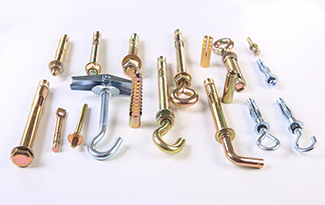
 Because drywall by itself will not hold a lot of weight, you will need to look at options such as these.
Screw-in drywall anchors
Drywall anchors look like plastic hollow screws. They are designed to lodge directly into drywall like a one-way valve. The anchor slides into the wall, then a hook deploys. It can't be pulled out. This is especially important if you're hanging a heavy object.
Expanding plastic sleeves
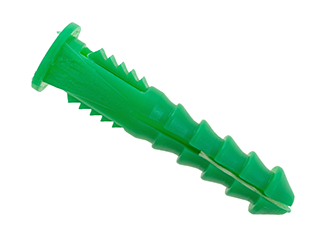
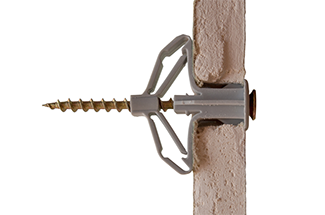
Intended for lightweight and medium-weight items such as heavy picture frames, bulletin boards, lightweight framed mirrors and shelving, and wall-mounted mirrors. These anchors have wings that spread out to help keep it and the object in place. It should fit snugly into the hole you drill, though you might need to tap it with a hammer to get it into the wall. Expanding plastic sleeves are best for securing objects to the drywall.
Picture frame hangers and nails
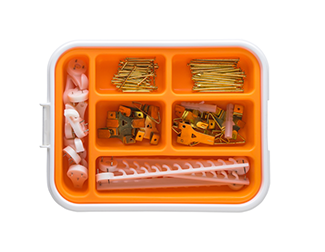 Picture frame hangers and nails work in two different ways. The nails drive into drywall and plaster walls at an angle, which allows them to use the wall surface as leverage and support. These are perfect for hanging items up to about 20 pounds. If you have a heavier object, use a flat-mounted hook and anchor. There are kits available that include a variety of hooks, nails, picture hangers, and wire in different sizes.
Picture frame hangers and nails come in a variety of sizes, sold separately and in kits. Grabbing a simple picture hanging kit from your local hardware store is always a good idea. You'll then have all the sizes of nails and hooks you may need on hand.
Tap-in expanding anchors
A tap-in expanding anchor is best for loads less than 10 pounds. Tap the pointed end and flat shank into the wall until it's flush. Then expand the anchor by driving a #6 screw into the hole.
Toggle bolts
Toggle bolts work for heavy loads, like a coat rack. They can be difficult to install because they require a larger hole, proper insertion, and careful screwing to expand the toggle and bring it flush to the inside of your drywall.
To use toggle bolts, drill a hole large enough for both the screw and toggle to fit into your drywall. Fit the item you wish to anchor over the bolt, insert the toggle and tighten. This will anchor the toggle to the inside of your drywall, creating a very sturdy place to hang heavy loads.
Anchor wire/monkey hooks
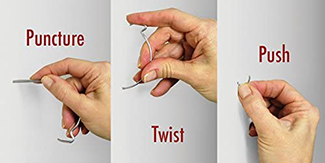
Anchor wire, or "monkey hooks," are curved pieces of metal that look similar to the hook on a dry-cleaning hanger. A single hook can hold up to 50 pounds. It is very sharp and pointed at one end. On the other end is a divot, which is where the picture is placed. These work well for mirrors or artwork hung with a wire that runs across the back of the framed item.
To use an anchor wire, press the sharp end into the wall at a downward angle and thread the wire through until it imbeds itself into the drywall. Then turn the hook up and push down until it completely wedges in. Once situated, hang the object.
Nails
Hang lighter artwork with nails. Use a hammer to tap the nail into the wall.
Adhesive strip or hooks
 These are a great option if you want to avoid making holes in the walls because they stick to the wall without damaging the paint (providing you follow the instructions properly.) Adhesive strips also stick to the art for even more security. Adhesives come in various sizes and use different glue strengths. Make sure to check the packaging before purchasing to ensure a sturdy hang.
Screws
Some pieces need more holding power than what nails or adhesive strips provide. They are better for hanging large, heavy pictures. When hanging a picture between studs, use a hollow-wall anchor, such as a toggle bolt, molly bolt, or spiral anchor. A spiral anchor is the easiest to install: Simply drive it into the wall with a screwdriver, then drive a screw into the anchor. Some spiral anchors come with special picture-hanging hooks.
Power Drill Tips
Keeping the drill at low speed, insert the drill, and gently apply pressure. You will feel it when you hit the stud. Pull the drill out slowly and hang the piece.
If your electric drill has a screwdriver bit, use it. Otherwise, a manual screwdriver will work. Place your screw into the small hole you created, and use the screwdriver to screw it in. Then, you can hang your picture.
A Hole Here. A Hole There. A Hole Everywhere.
If you rent your home, be sure to review your lease before mounting anything to the walls, as your landlord may not allow holes in the walls. Anchoring items to a stud will create an obvious hole that will need to be filled before you move out.
Podcast
###
Photo Credits:
- Shutterstock
RELATED CONTENT:
- Rosie eStore: Franklin Sensors Professional Stud Finder
- Blog: Selling your home? 20 Fixer-Upper Projects To Catch A Buyers Eye
- Blog: Do You Need To Hire A Handyman?
- DIY Q&A: Drywall Damage Patch & Repairs
- DIY Q&A: DIY Projects That Require A Permit
- DIY Q&A: Is It Legal For My Unlicensed Neighbor To Help With Projects?
- DIY Q&A: Why Do I Need Permits To Work Around My Home?
- Find Trusted Arizona Contractors & Home Improvement Service Providers
Print this page
recent post
- Duck, Duck, Duct! How Often Should Ductwork Be Cleaned?
- Vinyl vs. Fiberglass Windows: Which Is The Better Choice Of Replacement Window?
- We May Be The Grand Canyon State, But The Rocky Mountains Are Important For Arizona
- Welcome to Arizona! Things A Newbie to Arizona Should Know
- The Pros & Cons of Buying A Flipped House
- Getting In On The Ground Floor
- Why It’s More Critical Than Ever To Get Your AC Serviced Before Summer
- The Reality of Remodeling
- What To Look For When Comparing Your Roofing Quotes
- What To Expect When Buying New Windows & Doors
