How Much Time will that DIY Project Take?
 06 July 2016

Whenever you plan a do-it-yourself project, you probably wonder how long it will take. Can you finish in an hour, a day, a weekend? Could you end up creating a mess for a week or two?
If you’re inexperienced, you can increase chances of success by doing research first on what materials to buy in advance, what tools you’ll use, and what the steps are for your project. You can go online, and do all that ahead of time. Also be sure to ask lots of questions at the store when you buy materials.
Here are some possible projects to think about along with time estimates for the work plus a few tips on tricky issues. In most cases, the time frame doesn’t include hours you might spend planning what to do and shopping for equipment and materials.
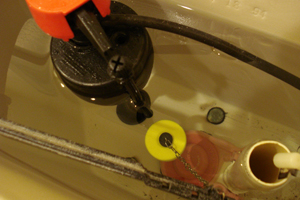
Changing the Flapper in Your Toilet Tank: One Hour

All those pipes and valves inside your toilet tank sit there in water for years, sometimes decades. Over time things get rusty; parts wear out; and soon the toilet doesn’t work as well. You can replace some parts over time to extend the life span of your toilet. Start with a new flapper valve, the device that controls the flush. The rubber flapper can become brittle and doesn’t seal well after a flush; then your toilet starts running all the time. Turn off the valve on the water line that supplies your toilet. Flush the toilet to empty the tank. Remove the flapper and take it to a hardware store to find a replacement just like the old one. Go home and replace the flapper. Once you’ve tried that you might take on replacing all the equipment in the tank.
Changing the Supply Hoses on All Your Toilets: Two hours
You need to replace all plastic flexible lines with braided stainless steel lines to avoid leaks. In many cases you can do this yourself; especially if you have those new ball-joint valves that make it easy to turn off your water. Never use supply lines that have plastic nuts at the end of them; you want brass components at both ends. All you need to do this job is a wrench or pair of pliers, new flexible braided stainless steel lines, and a little plumber’s tape.
Turn off the water to the toilet with the angle stop. Flush the toilet a few times to empty it. Use towels to soak up the water inside the tank so it doesn’t leak on the floor. Use a wrench or pliers to help remove the supply line. Install the new line and tighten the nuts as needed. Turn the water back on and check for leaks. To double check about leaks, lay some toilet paper on the floor under the toilet tank. If there are leaks, they will show up quickly on the paper. Then you need to tighten the nuts. A similar method for replacing supply lines may be used for sinks.
Watch our related video on this topic here.
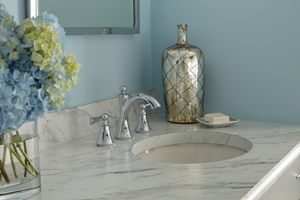
 Installing a New Bathroom Faucet: Half to a Full Day
In replacing an old bathroom faucet, buy a new one that fits the holes that were cut in your sink or countertop. To replace that old faucet, first shut off the valves on the water supply lines, of course. Then remove the assembly of the old faucet. Some issues to keep in mind:
- You may have to use a tool called a basin wrench if you can’t reach connections with your hands.
- When you disconnect the lift rod that closes the drain, you will also have to remove the P-trap under the sink. Put a bucket under the drain to catch the water.
- Follow all the manufacturer’s directions for installing the new faucet. Not all faucets come assembled so you may have to put some parts together before installation.
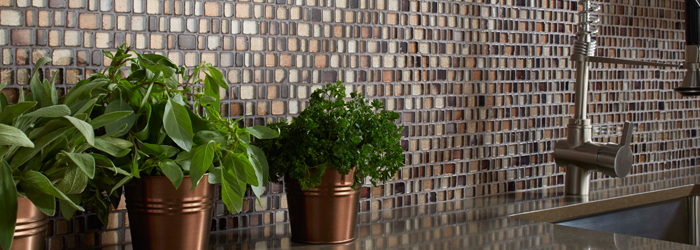
Adding a Tile Backsplash in Your Kitchen: Two Days
 It’s easy to install tile on a cleaned-up, painted wall surface behind the counters, sink and range in your kitchen. If you have wallpaper, however, it needs to be removed. Then sand the surface and clean up all the dust. Easiest to work with are mesh-backed sheets of mosaic glass or ceramic tiles. Measure your space to estimate how many sheets you need to buy.
When you get the tiles home, measure your space again. Then use masking tape to outline the size and shape of the wall you are covering on the kitchen floor. Lay down the mesh sheets of tiles to see how they will fit the space on the floor.
In some cases, you will have to fill in odd gaps with partial sheets or extra tiles. Try to arrange the extra tiles so they’re in an area where they will be less visible. If you need to cut tiles to make them fit, use a tile saw or carbide nipper. Use spacers between sheets in order to keep the joints of equal size.
The trickiest part of this job is smoothly applying a layer of thin-set on the wall and then setting the tiles on top of it. You’ll need a wide array of tools including a level, tape measure, notched putty knife, grout application trowel, and sponges. Some 5-gallon buckets will come in handy, too.
Painting a Small Bedroom: Two to Three Days
For a small bedroom, repainting probably will take about a weekend. Save time by not painting the ceiling if it’s in pretty good shape; you may not need to paint woodwork either. Moving furniture and covering everything with drop cloths will take some time and effort. Then tape all the baseboards and other framing on windows and doors with special painting tape like Frog Tape or similar brands specially designed to keep paint from bleeding onto woodwork.
Always use top-quality paint like the PPG brand, for example. If you’re changing colors, you need to prime the walls with an undercoat or use two coats of paint. If you’re applying flat paint on a wall that previously had a high or semi-gloss finish, prime it first. You always have to let paint or primer dry before putting on the next coat.
Be sure to pull off the tape as soon as all the paint is on the walls. Don’t wait until paint thoroughly dries or you could pull paint off the woodwork.
One tip: Rough up the finish a bit with sandpaper or a good scrubbing with the cleaner TSP (trisodium phosphate), even before you prime. Flat paint won’t adhere well to a glossy wall if you don’t scrub it. Wear gloves and goggles for this process.
Of course, with all these jobs, the first time will be the toughest. After that, you’ll be an expert.
###
Photo Credits:
- Rosie on the House: Inside toilet tank; flapper
- Moen: Bathroom faucet
- Dal-Tile: Header image and content image of back-splash
RELATED CONTENT:
- DIY Video: DIY Related Videos
- BLOG: Selling your home? Here are 20 DIY Projects to Help.
- DIY Q&A: DIY Projects that Require a Permit
- DIY Q&A: How to Properly Store DIY Materials
- Search our DIY Home Improvement Database & Library
- Weekly Podcast: Subscribe for free!
Print this page
recent post
- Duck, Duck, Duct! How Often Should Ductwork Be Cleaned?
- Vinyl vs. Fiberglass Windows: Which Is The Better Choice Of Replacement Window?
- We May Be The Grand Canyon State, But The Rocky Mountains Are Important For Arizona
- Welcome to Arizona! Things A Newbie to Arizona Should Know
- The Pros & Cons of Buying A Flipped House
- Getting In On The Ground Floor
- Why It’s More Critical Than Ever To Get Your AC Serviced Before Summer
- The Reality of Remodeling
- What To Look For When Comparing Your Roofing Quotes
- What To Expect When Buying New Windows & Doors
